| |
Making the Most of Summer Harvest
By Tess Hoke
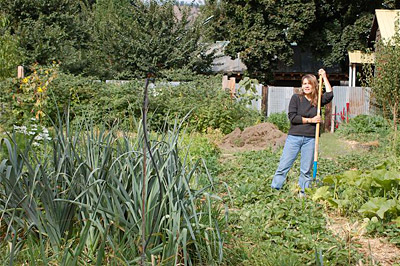
If you are like me and are growing a garden this summer or are committed to eating locally from farmers markets and valley gardens, then you know that the days are long and hot and fresh food is everywhere! As one travels further down the locavores path of eating from one's own food shed, it becomes clear that a successful season of foraging and putting away will require a bit of juggling, attention to detail, and no wasted moves! A simple day in the garden may start out with an empty basket to fill with the last of the summer raspberries but can quickly be interrupted by the green beans calling out that it's today or never. Drop what you are doing and tend them, but don't forget that the basil was in line for a picking today, too. The carrots need another thinning, the water needs moving and the refrigerator is still full of the garden produce that you picked yesterday. To keep ahead of the tasks while reaping the summer's harvest, here are a few ideas that might help you along the way.
 The first thing to remember when eating local food is to eat as much of it as you can! It will be a full year before these fresh tastes come out of the garden again, so there should be no scrimping on the number of servings of sliced red strawberries dripping with backyard honey that get poured over morning breakfast cereal or evening dessert. Fresh fruits are abundant in the Methow now with soft fruits like peaches and nectarines making their way in from the orchards. A box or two of your favorite variety can provide plenty of fresh eats and still leave some to store for later use. A quick way to put away the harvest is to freeze the extra for jams, pies and cobblers. Or slice the fruit thin and use a home food dehydrator to turn these flavors into ingredients for a winter emmer pilaf or as a welcomed snack on the ski trail. The first thing to remember when eating local food is to eat as much of it as you can! It will be a full year before these fresh tastes come out of the garden again, so there should be no scrimping on the number of servings of sliced red strawberries dripping with backyard honey that get poured over morning breakfast cereal or evening dessert. Fresh fruits are abundant in the Methow now with soft fruits like peaches and nectarines making their way in from the orchards. A box or two of your favorite variety can provide plenty of fresh eats and still leave some to store for later use. A quick way to put away the harvest is to freeze the extra for jams, pies and cobblers. Or slice the fruit thin and use a home food dehydrator to turn these flavors into ingredients for a winter emmer pilaf or as a welcomed snack on the ski trail.
Savory herbs like cilantro, parsley and basil are in turbo growth mode and you don't want to miss them. Chopped into fresh green salad, they add an extra zing for your taste buds. To keep them from bolting and going to seed, harvest them regularly and use what you can't eat fresh to make a simple pesto that stores well. Simply toss herbs and garlic into a food processor, drizzle in olive oil and add salt to taste and freeze in ice cube trays. These little nuggets can be stored in bags and added to winter soups or pastas to add flavor depth.
When the refrigerator crispers begin to overflow and family consumption can't keep up with the produce coming in from the garden, it's time for guerilla processing. Excess tomatoes can easily be turned into a thick red sauce simply by filling a large roaster pan with the halved fruit, adding fresh garlic, herbs, salt and drizzled olive oil and baking uncovered in a 300 degree oven until desired consistency is reached. The 2-3 hour cooking time will give you a chance to multi-task and take cucumbers, green beans, cauliflower and beets that have been piling up and use many easy recipes to make a variety of pickles that will stock the pantry shelves.
Don't forget that many garden veggies are simple to freeze and store well if processed correctly. Blanching of crops like green beans, chard and kale will kill the naturally occurring enzymes that break down food over time. To keep your vegetables colorful, nutritious and tasting fresh, just bring a pot of water to a boil, immerse prepped quantities for two minutes until they turn bright green and them submerge in ice water until cooled. Drain well, pack in storage bags and fill the freezer!
And then there is the zucchini. Unless you are planning to feed the neighborhood, one or two plants of this versatile summer squash is plenty to fill your plate. While there are many recipes that can use this ingredient in delicious ways, a popular favorite is zucchini fritters. Grate up two small squash for the meal, add any fresh chopped veggies and herbs that you have on hand, whisk in a fresh egg, salt and pepper and fry up these pancake size treats. Delicious!
Recipe: Baked Kale Chips
Take four large handfuls of fresh kale leaves, wash and spin dry. Chop into chip size pieces. Place in a bowl, drizzle 2 T olive oil and use hands to coat leaves evenly. Line baking tray with parchment paper, arrange leaves so as not to overlap and place in a 350 degree oven until crispy, about 10-15 minutes. Remove from oven and sprinkle with kosher salt. Let cool and store in air tight container.
Helpful Hint: Make sure to salt chips after they come out of the oven. Salting before baking makes kale leaves leach out water which will make them soggy! Kale chips can also be done in a dehydrator
Aug 6, 2010.
|
|
